Creating accessible electronic documents ensures equivalent access to instructional resources by persons with print disabilities. The most common document formats used in Mason classrooms are Word, PowerPoint, and PDF.
To make your documents accessible, please review the resources below:
Create an Accessible Word Document
Check each of the following topics to create an accessible Word document using Microsoft 365 (online and desktop). Differences between the two are highlighted when appropriate.
Document Structure (Structural Elements)
Video: Improve Accessibility with Heading Styles (1:26)
 Microsoft. Improve Accessibility with Heading Styles [Video].
Assigning headings in documents is an important accessibility feature. Headings act much like an outline. Moving from heading to heading is the number one way people who use assistive technologies navigate to the section or content they need. Use Headings to provide sequential and relational understanding.
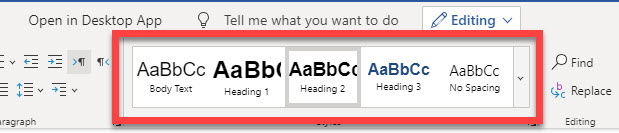
- Highlight text and select appropriate ‘Heading’ from top menu bar on Styles sections in the HOME tab.
- The first Heading in a document should be assigned as a Heading 1.
NOTE: There should be no less than one heading per 2 pages (per built-in MS Office accessibility check guidelines). Additionally, the using Headings in a document allows you to create a ‘linked’ Table of Contents opens a new window.
For information on how to customize your Headings, see Customize of Create New Styles opens a new window.
Video: Create A Bulleted or Numbered List (1:35)

Microsoft. Create a Bulleted or Numbered List [Video].
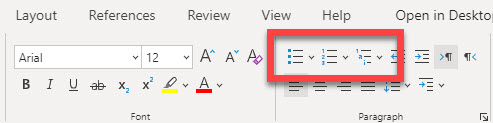
Always use the Bullet and Numbering tools to create bulleted and numbered lists, respectively. Lists allow a screen reader users to determine the list length, number, and organization. They also naturally ‘break up’ the document, improving readability for individuals with low vision and/or learning/cognitive challenges.
- Select the type of Bulleted (unordered) or Numbering (ordering) from the Paragraph section on the HOME tab.
Video: Create Accessible Tables in Word (2:18)
Microsoft. Create Accessible Tables in Word. [Video].
Tables can be difficult for individuals who use assistive technology to read, especially those using screen readers. Whenever possible, use simple tables (i.e., one row for column headers and one column for row headers). Following the steps below to identify the header rows in tables for MS Office 365.
- Select the Insert tab.
- Click on Table.
- Choose the table size.
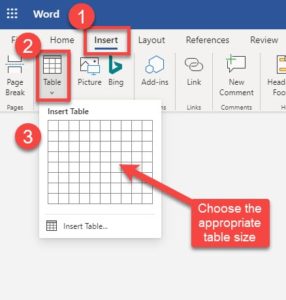
- Enter all table data.
- Click in any of the cells to open the Table Design and Table Layout tabs.
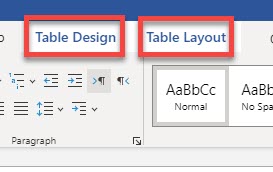
- Click on the Table Design tab. In the Table Style Options, check the box for Header Row (column headers) and First Column (row headers), if applicable.

- Click on the Table Layout tab. Then, click Alt Text. Although not required, Alt Text allows you to provide an alternative description of the table. This is beneficial for complex tables, which may prove difficult for screen reader users to navigate even when it is accessible.

Font Styles, Colors, and Contrast
Using color alone to identify or emphasize important information could impact individuals with visual challenges (i.e., low vision, colorblindness).
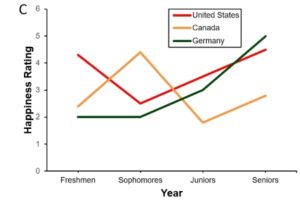
Example of poor use of color
In this example, the US, Canada, and Germany are identified by color alone.
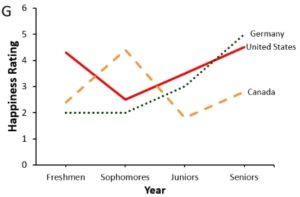
More accessible version of same chart
Using the same chart, now color, line type (i.e., dashed, solid), and labels are used to distinguish between the different countries.
Although there are many fonts to select from when creating a document, it is important to choose those that are recommended for both readability and availability across computer platforms. It is suggested that selecting one of the following sans serif font styles make documents accessible to the largest audience possible: Arial & Verdana (size 12 pt).
Sans serif fonts improve readability for individuals with low vision and/or other types of print disabilities (e.g., dyslexia).

Images and Hyperlinks
Video: Improving Accessibility with Alt Text (2:08)
Microsoft. Improve accessibility with alt text [Video].
Images, charts, and objects within documents should be described using alternative text descriptions. The alternative text (i.e., alt text) is necessary for screen reader users to interpret what information the images are intending to relay.
NOTE: Alt text only benefits screen reader users. To provide additional understanding for individuals who may have learning/cognitive disabilities, insert a caption.
- Select an image.
- Click on the Picture tab
- Then select Alt Text.
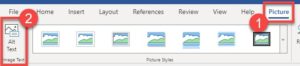
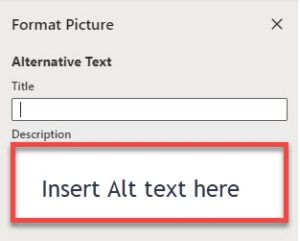
- Enter the alt text in the Description box. (NOTE: Leave the Title blank. You only need to fill out this field if the alternative text description is long.)
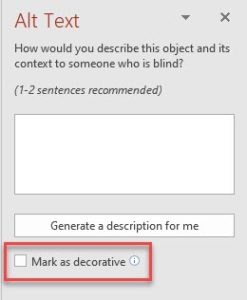
NOTE: The Desktop version of Microsoft 365 differs slight. Click on Picture Format > Alt Text in the Ribbon toolbar. Instead of a Format Picture window, the Alt Text window opens (shown below). It includes a field for adding an alternative text description and a checkbox option that allows you to classify the image as decorative (i.e., Mark as Decorative). In other words, the image does not contain beneficial information and, therefore, can be ignored by the screen reader user.
VIDEO: Create Accessible Links in Word (2:09)
MIcrosoft. Create Accessible Links in Word [Video].
Hyperlinks should inform users where clicking the link will actually take them.
- E.g., Use George Mason University Home Page opens a new window as opposed to http://www.gmu.edu opens a new window.
- E.g., Avoid URLs and non-specific references like “click here” or “read more”
To create meaningful hyperlink in Microsoft 365 Word, do the following:
- Select the URL that you would like to replace with meaningful hyperlink text.
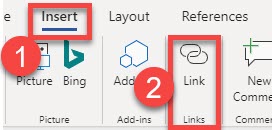
- Go to the Insert tab. Select Links.
- Enter the descriptive link text in Display text text box.
- Enter the URL in the Address text box.
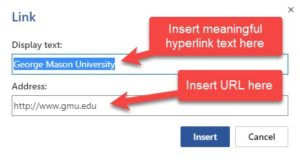
- Click Insert.
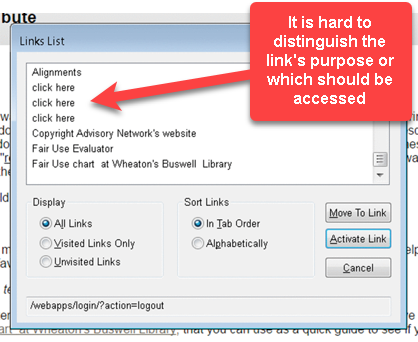
Why is this important?
Screen reading applications allow users to list the links on the page in a separate dialog window. This feature allows a user to quickly scan through all of the links on a web page. Unfortunately, it also strips away the surrounding content leaving the user only with the link text provided.
Create an Accessible PowerPoint Presentation
The techniques for creating accessible images, lists, tables, hyperlinks, and choosing appropriate font styles and colors are the same for both Word and PowerPoint. For detailed guidance on those techniques, visit the Create an Accessible Word Document section. For strategies that are specific to creating an accessible PowerPoint presentation using Microsoft 365 (online and desktop), see below (Note: Differences between the two are highlighted when appropriate).
Accessibility Strategies for PowerPoint
Similar to templates and themes, built-in layouts provide heading structure and reading order for screen reader users. Inserting text boxes can cause issues with order that information is presented to screen reader users.
- From the HOME tab, select New Slide.
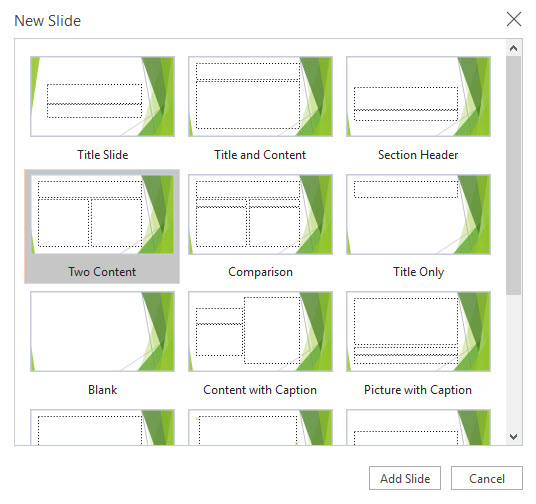
- Choose an appropriate layout and select Add Slide.
- Ensure each new slide has a unique title.
NOTE: Using built-in layouts also allows you to maintain that same structure and reading order when the presentation is converted into a PDF document.
Unique titles assist screen reader users with identifying when they move to a new slide. Each slide should include a unique title.
Video: Use more accessible colors and styles in slides (2:16)
 Microsoft. Use more accessible colors and styles in slides [Video].
PowerPoint’s built-in templates and themes provide slides with key accessibility features, such as high contrast ratio and reading order structure.
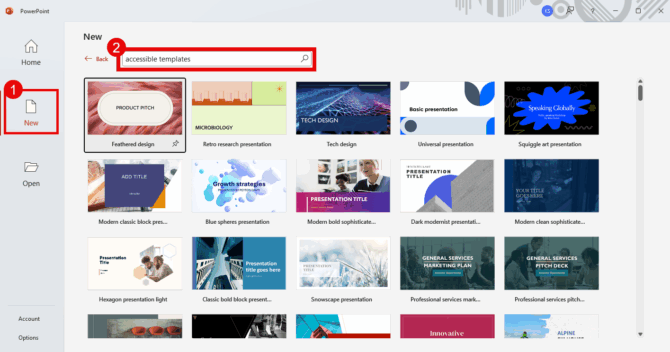
- To find accessible templates, open PowerPoint and type “accessible templates” in the search field. If you are already in PowerPoint, click File>New.
- To see other color, style, and font options, browse the PowerPoint themes. On the Design tab, expand the Themes menu and select a theme that suits your purposes.

Video: Improve Image Accessibility in PowerPoint (1:38)
Microsoft. Improve Image Accessibility in PowerPoint [Video].
Images, charts, and objects within documents should be described using alternative text descriptions. The alternative text (i.e., alt text) is necessary for screen reader users to interpret what information the images are intending to relay.
Alt text only benefits screen reader users. To provide additional understanding for individuals who may have learning/cognitive disabilities, insert a caption.
- Select an image.
- Click on the Picture tab.
- Then select Alt Text.
- Enter the alternative text description (i.e., Alt Text).
NOTE: The Desktop version of Microsoft 365 differs slight. Click on Picture Format > Alt Text in the Ribbon toolbar. Instead of a Format Picture window, the Alt Text window opens (shown below). It includes a field for adding an alternative text description and a checkbox option that allows you to classify the image as decorative (i.e., Mark as Decorative). In other words, the image does not contain beneficial information and, therefore, can be ignored by the screen reader user.
Checking Accessibility
Check each of the following topics to ensure your documents are accessible prior to sharing with others.
Testing your Document for Accessibility
To check a document or presentation for accessibility, Microsoft 365 provides a built-in accessibility feature.
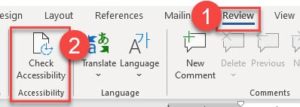
- Select the Review tab.
- Click on Check Accessibility.
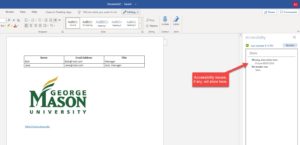
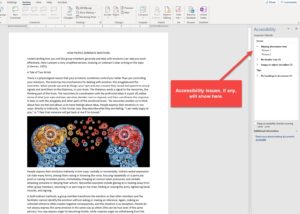
- If there are accessibility issues, they will appear Accessibility pane to the right of your document window.
NOTE: The Accessibility Checker in the online version of Microsoft 365 is limited. While it can identify issues, it does not suggest fixes. It is recommended that you make corrections to the accessibility issues in the Desktop version of Microsoft 365 or Office 2019.
Video: Check Document Accessibility in Word (1:10)
Microsoft. Check Document Accessibility in Word. [Video].
To check a document or presentation for accessibility, Microsoft 365 provides a built-in accessibility feature.
- Select the Review tab.
- Click on Check Accessibility.
- If there are accessibility issues, they will appear Accessibility pane to the right of your document window.
- Click the issue to make available Recommended Actions for remediation.
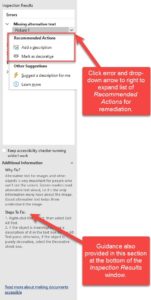
NOTE: The Check Accessibility feature in the online version of Microsoft 365 is limited. While it can identify issues, it does not provide Recommended Actions. This feature is only available in the desktop version of Office 365.
Converting your Word or PPT document into an accessible PDF
Before converting, please follow the steps on this web page for creating an accessible Word document or PowerPoint presentation. The steps listed below will help you ensure that much of the work you did to make these resources accessible will carryover when the PDF is created.
To convert your existing Word document or PPT presentation into an accessible PDF, do the following:
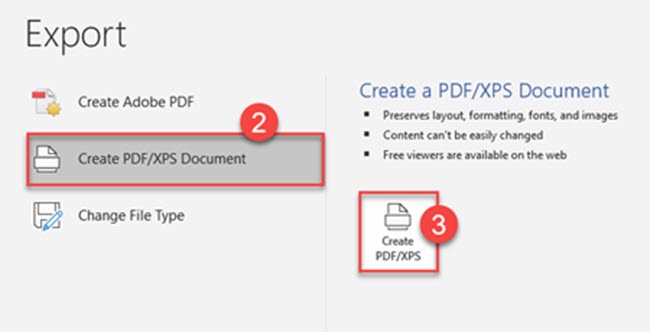
- Click File, then Export.
- Click Create PDF/XPS Document.
- Click Create PDF/XPS button.
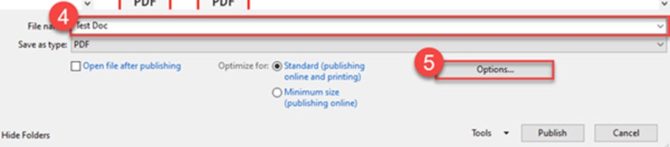
- In the Publish as PDF or XPS window, enter a File Name and then click the Options button.
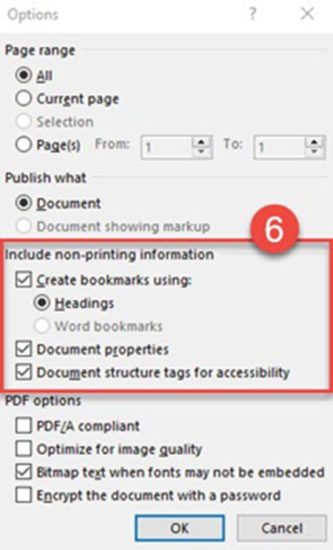
- In the Options dialog window, make sure the following options are selected:
- Create bookmarks using — Headings.
- This selection automatically creates bookmarks in your PDF document using the heading styles that you have added in Word.
- PLEASE NOTE: This option is not available when converting PPT presentations into accessible PDFs.
- Document properties
- This selection ensures that the document title and author information are carried over into your PDF document.
- Document structure tags for accessibility
- This selection ensures that any structural elements you created in your Word/PPT document (i.e., lists, headings, etc.) are tagged as such in your PDF document.
- Create bookmarks using — Headings.
Before converting, please follow the steps on this web page for creating an accessible Word document or PowerPoint presentation. The steps listed below will help you ensure that much of the work you did to make these resources accessible will carryover when the PDF is created.
To convert your existing Word document or PPT presentation into an accessible PDF, do the following:
- Click File, then Save As Adobe PDF.
- In the Save as Adobe PDF window, enter a File Name and then click the Options button.

- In the Options dialog window, make sure the following options are selected:
- Convert document information
- This selection ensures that the document title and author information are carried over into your PDF document.
- Enable Accessibility and Reflow with tagged Adobe PDF
- This selection automatically tags the structural elements in your document (i.e., lists, headings, etc.) so that these elements can follow the appropriate reading sequences when the text is reflowed.
- Reflowing your PDF allows readers restructure content into a single column. This makes for easier reading on a mobile device or for those who prefer to streamline the interface.
- Create Bookmarks — Convert Word Headings to Bookmarks.
- This selection automatically creates bookmarks in your PDF document using the heading styles that you have added in Word.
- PLEASE NOTE: When converting PPT presentations into accessible PDFs, simply check the Create Bookmarks box. The conversion process will use the elements embedded in the built-in layout for your presentation.
- Convert document information

Additional Resources
Microsoft’s Office Tutorials
The following links will take you to Microsoft’s website for detailed information on making Office documents accessible.
-
- Microsoft Accessibility Checker opens a new window
- Make Accessible Microsoft Office Content opens a new window
- Accessible Word Documents Training Videos (Microsoft) opens a new window
- Microsoft Word Best Practices opens a new window
- Accessible PowerPoint Training Videos (Microsoft) opens a new window
- PowerPoint Best Practices opens a new window
- *NEW* Microsoft Accessibility Reference Guides:
PDF Documents
Still have questions?
If you have additional questions related to document accessibility, please contact the ATI.